> ## Documentation Index
> Fetch the complete documentation index at: https://docs.vibeflow.ai/llms.txt
> Use this file to discover all available pages before exploring further.
# Flow Activation
> Test and debug your workflows directly on the canvas with real-time execution feedback
Flow Activation lets you run your workflows directly from the canvas to verify they work as expected before deploying. When you activate a flow, VibeFlow executes each node in sequence, captures inputs and outputs at every step, and provides real-time visual feedback so you can debug issues instantly.
## How It Works
Every flow starts with an entry node (such as a **Start Node**, **Webhook**, or **Cron**) and connects through action nodes. Flow Activation runs this entire pipeline with test data so you can see exactly what happens at each step.
 ## Running a Flow
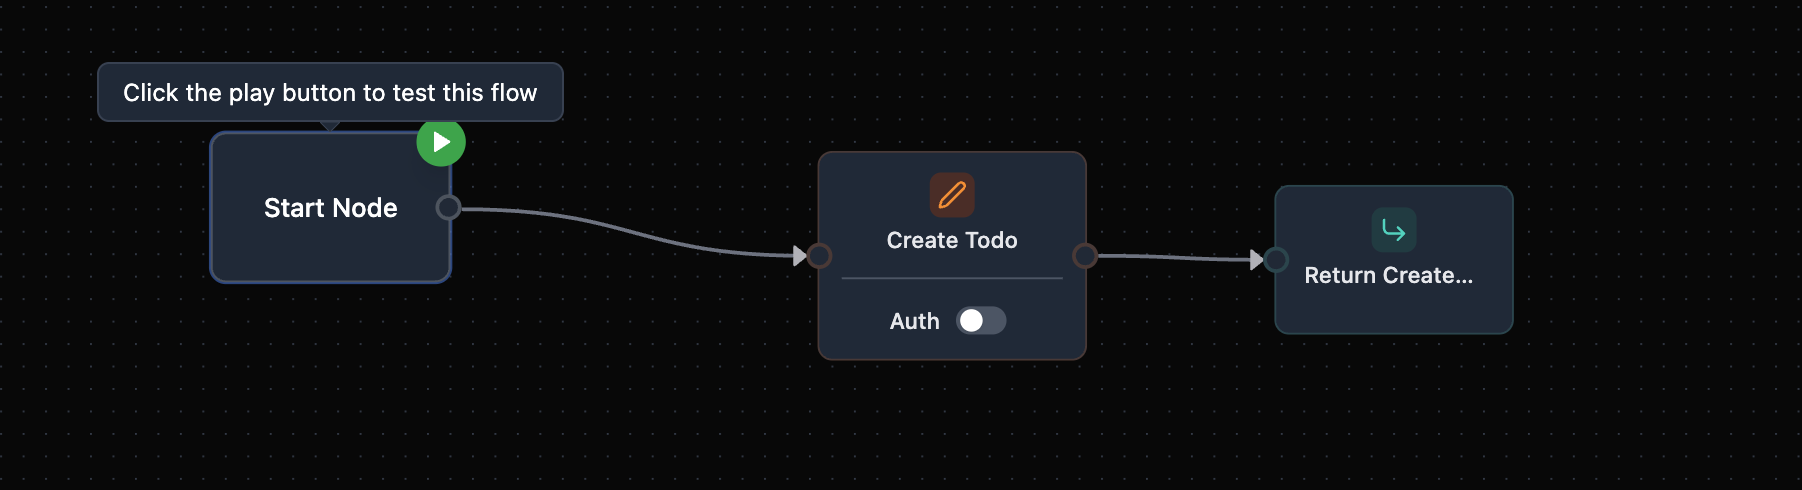
Click the **play button** on the Start Node of your flow. This opens the Test Flow dialog where you can configure the input data for your test run.
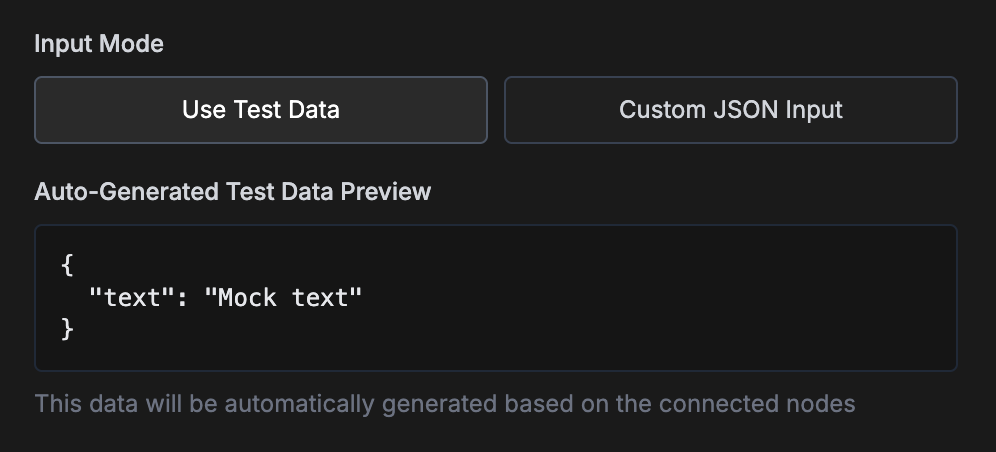
Choose between **Use Test Data** (auto-generated mock data based on your node configuration) or **Custom JSON Input** to provide your own payload. VibeFlow analyzes downstream nodes and generates realistic mock values. For example, a `text` field gets `"Mock text"` as a default value.
## Running a Flow
Click the **play button** on the Start Node of your flow. This opens the Test Flow dialog where you can configure the input data for your test run.
Choose between **Use Test Data** (auto-generated mock data based on your node configuration) or **Custom JSON Input** to provide your own payload. VibeFlow analyzes downstream nodes and generates realistic mock values. For example, a `text` field gets `"Mock text"` as a default value.
 Once you click **Run Test**, VibeFlow executes each node in topological order. Nodes light up as they execute, transitioning from idle to executing to completed (or error). Edges animate to show data flowing between nodes.
After execution, click any node to see its **Captured Input** and **Captured Output**. This shows the exact data that flowed in and out of each node, along with timestamps.
## Captured Input & Output
Every node in an activated flow captures the data it received and the data it produced. This makes it straightforward to trace how data transforms as it moves through your workflow.
### Captured Input
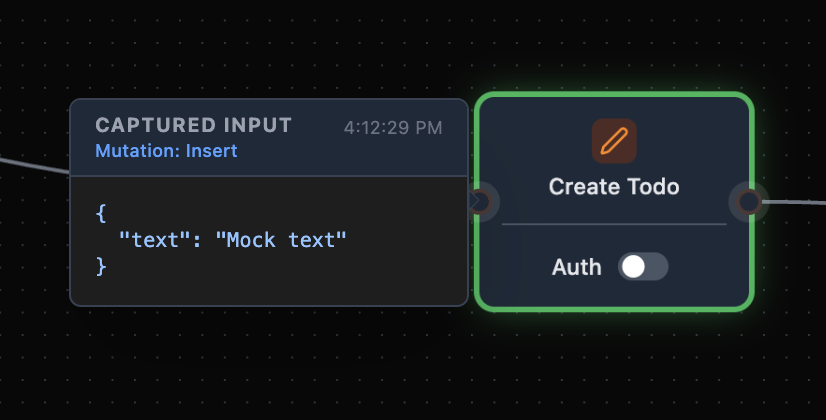
The input panel shows the exact payload a node received from its upstream connection. In this example, the **Create Todo** mutation node receives the `text` field from the Start Node input.
Once you click **Run Test**, VibeFlow executes each node in topological order. Nodes light up as they execute, transitioning from idle to executing to completed (or error). Edges animate to show data flowing between nodes.
After execution, click any node to see its **Captured Input** and **Captured Output**. This shows the exact data that flowed in and out of each node, along with timestamps.
## Captured Input & Output
Every node in an activated flow captures the data it received and the data it produced. This makes it straightforward to trace how data transforms as it moves through your workflow.
### Captured Input
The input panel shows the exact payload a node received from its upstream connection. In this example, the **Create Todo** mutation node receives the `text` field from the Start Node input.
 ### Captured Output
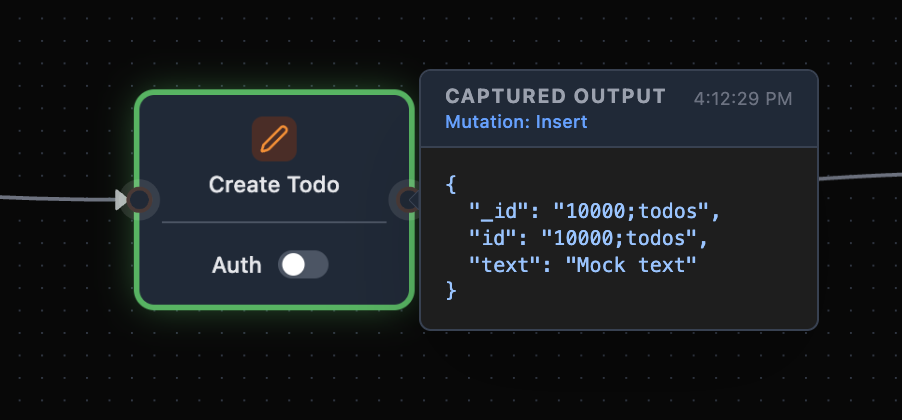
The output panel shows what a node returned after execution. For a mutation insert, this includes the newly created document with its generated `_id` and `id` fields alongside the input data.
### Captured Output
The output panel shows what a node returned after execution. For a mutation insert, this includes the newly created document with its generated `_id` and `id` fields alongside the input data.
 ### Discovering Available Variables
Captured data is also the easiest way to figure out which variables you can use when wiring up nodes. After running a flow, you can see every field a node produces and **drag variables** directly from the captured panels into fields on other nodes.
For a full guide on variable references and how to pass data between nodes, see [Named References](/concepts/named-references).
## Auto-Generated Test Data
When you select **Use Test Data**, VibeFlow automatically generates mock values based on your node configuration:
| Field Pattern | Generated Value |
| -------------------------------------- | --------------------------------- |
| `email` | `test@example.com` |
| `firstName` | `John` |
| `lastName` | `Doe` |
| `name` | `Mock Name` |
| `username` | `johndoe123` |
| `phone` | `+1234567890` |
| `address` | `123 Mock Street` |
| `url`, `link` | `https://example.com` |
| `image`, `avatar` | `https://via.placeholder.com/150` |
| `text`, `description` | `Mock text` |
| `title`, `subject` | `Mock Title` |
| `price`, `cost` | `99.99` |
| `status` | `active` |
| `tags`, `items` | `["item1", "item2", "item3"]` |
| Date fields (`date`, `createdAt`) | Current ISO timestamp |
| Boolean fields (`active`, `completed`) | `true` / `false` |
| ID fields | `mock__` |
This means you can test flows immediately without manually crafting input payloads. For more control, switch to **Custom JSON Input** and provide your own JSON.
## Authentication Toggle
Nodes that support authentication display an **Auth** toggle at the bottom. When enabled, the node requires a valid user session to execute. During flow activation, authentication is automatically simulated. VibeFlow stubs auth calls with a simulated user identity, so auth-enabled nodes execute normally without requiring a real login session.
## Error Handling
If a node fails during activation, it shows an error state with the error message. Downstream nodes are automatically skipped when an upstream node fails, so you can quickly identify the root cause of issues without wading through cascading errors.
## Next Steps
Learn how to configure database mutations in your flows
Configure how your flow returns data to the caller
Reference data from any upstream node using named references
Build and test your first flow from scratch
### Discovering Available Variables
Captured data is also the easiest way to figure out which variables you can use when wiring up nodes. After running a flow, you can see every field a node produces and **drag variables** directly from the captured panels into fields on other nodes.
For a full guide on variable references and how to pass data between nodes, see [Named References](/concepts/named-references).
## Auto-Generated Test Data
When you select **Use Test Data**, VibeFlow automatically generates mock values based on your node configuration:
| Field Pattern | Generated Value |
| -------------------------------------- | --------------------------------- |
| `email` | `test@example.com` |
| `firstName` | `John` |
| `lastName` | `Doe` |
| `name` | `Mock Name` |
| `username` | `johndoe123` |
| `phone` | `+1234567890` |
| `address` | `123 Mock Street` |
| `url`, `link` | `https://example.com` |
| `image`, `avatar` | `https://via.placeholder.com/150` |
| `text`, `description` | `Mock text` |
| `title`, `subject` | `Mock Title` |
| `price`, `cost` | `99.99` |
| `status` | `active` |
| `tags`, `items` | `["item1", "item2", "item3"]` |
| Date fields (`date`, `createdAt`) | Current ISO timestamp |
| Boolean fields (`active`, `completed`) | `true` / `false` |
| ID fields | `mock__` |
This means you can test flows immediately without manually crafting input payloads. For more control, switch to **Custom JSON Input** and provide your own JSON.
## Authentication Toggle
Nodes that support authentication display an **Auth** toggle at the bottom. When enabled, the node requires a valid user session to execute. During flow activation, authentication is automatically simulated. VibeFlow stubs auth calls with a simulated user identity, so auth-enabled nodes execute normally without requiring a real login session.
## Error Handling
If a node fails during activation, it shows an error state with the error message. Downstream nodes are automatically skipped when an upstream node fails, so you can quickly identify the root cause of issues without wading through cascading errors.
## Next Steps
Learn how to configure database mutations in your flows
Configure how your flow returns data to the caller
Reference data from any upstream node using named references
Build and test your first flow from scratch